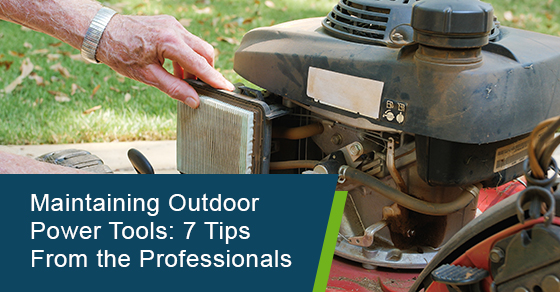
Maintaining Outdoor Power Tools: 7 Tips From the Professionals

High-quality power equipment is an investment that you hope will last for many, many seasons of yard work. You want to keep your tools performing just as they did on the day they were purchased. The secret to accomplishing this? Maintenance.
Replacing tools all the time is undoubtedly expensive, and it’s easy to avoid with a bit of diligence and proactiveness. Maintaining your tools is the key to their longevity and effectiveness. It also ensures that they remain safe to use.
It’s worthwhile to learn how to properly maintain your outdoor power equipment. While each machine has different maintenance requirements, here are seven steps that you can use on a variety of tools to keep them in peak condition.
Safety First.
Before you do any work on any piece of machinery, you must disconnect its power source. For gasoline-powered equipment, first remove the spark plugs. With electrical equipment, simply unplug.
1. Proper equipment storage
Having working equipment in the spring begins with proper winterization many months before. Before putting equipment to bed for the season, do a thorough cleaning, check for damage, and grease all moving parts.
Anything with a gasoline engine should have the fuel tank emptied—otherwise, you may find it difficult to start come spring! When old gasoline sits in a fuel tank for an extended period of time (typically three or more months), it loses its flammability and begins to break down, potentially clogging the fuel system.
Store your gasoline-powered equipment away from sunlight where it’s cool. Fluctuating temperatures are hard on mechanical systems and can cause problems later on.
To ensure the longevity of any rubber on your equipment, avoid sunlight, moisture, and heat. Use blocks to lift the equipment off the ground and throw a tarp over it. This will allow for air circulation, limiting the chance of moisture accumulating.
Battery-powered equipment should also be stored in a dry location, ideally at a temperature of 10 to 15°C. Charge the battery to 75% before storage.
2. Check oil levels
Checking the oil regularly will keep your equipment running better for longer. It’s a good idea to check the oil level before each use so you know if it needs to be topped up. Lawnmowers need an oil change after 50 hours of use.
3. Sharpen or replace blades
Regularly sharpening the blades on your mower or hedge trimmer will make your job easier and keep your yard looking better. Remember that the more the blades are used, the more frequently they will need to be sharpened!
Dull blades can damage grass, leave frayed edges on hedges, or make uneven cuts. Not only does this look bad, but it also makes plants vulnerable to pests and disease. Furthermore, worn-down blades compromise performance since the machine is forced to work much harder to complete the same task.
When sharpening the blade, you want to stay true to the original angle of the cutting-edge. Most equipment is manufactured at a 30-degree angle.
4. Lubricate cables and moving parts
Reducing friction, maintaining performance, and preventing equipment damage begins with lubrication. For machines like lawnmowers, hedge trimmers, and chainsaws, apply lubricant to the moving parts. All it can take to avoid a snapped cable is a couple of drops of oil!
5. Use a clean air filter
A smoothly running engine needs a clean air filter. Dirty filters reduce efficiency, add extra stress to the engine, and mean that your equipment won’t perform optimally. You should replace the air filter regularly, at least once a year for most equipment. With gas chainsaws, swap out the filter after 100 hours of use or every three months.
6. Go easy on the trigger
Burning out the trigger and on/off switches on your equipment is easy to do and very common. Fortunately, it’s also easy to avoid. Trigger burnout is caused when the equipment is turned off while the motor is still running hot, which can then fry the electrical systems. Letting the tool idle for a few seconds before turning it off can prevent this from happening.
7. Retighten bolts and screws
Before getting to work, check that all accessible screws and bolts are tightened. If any are loose and require a little tightening, applying some oil and anti-rust protection at this time will add to their longevity. You also want to avoid having screws that are too tight, as those will make the equipment feel stiff and be harder to use.
Maintaining Your Outdoor Power Tools
No one likes replacing expensive power tools unnecessarily. Proactively taking steps to maintain your equipment can help them last longer and ultimately, be easier on your wallet. When a machine is in proper working condition, it gets the job done better and faster.
The best thing you can do to ensure that your power equipment has a long life is to invest in high-quality machinery from the outset. That’s why here at Peel, we are an authorized dealer of STIHL outdoor power equipment. STIHL tools are of the highest quality available and will allow you to get the job done right—the first time.
After setting yourself up for success with a piece of power equipment from STIHL, proper maintenance is crucial. STIHL products are incredibly durable, but that doesn’t mean you should be negligent about maintenance! By storing properly, regularly checking oil levels, sharpening dull blades, lubricating all moving parts, replacing the air filter, going easy on the trigger, and retightening bolts and screws, your tools will be long-lasting and high-performing.
To learn more about STIHL outdoor power equipment, call Peel Exterior Maintenance at 1-905 873 8988 or contact us here.
